Quick Answer
To put on a wig, start with clean, dry hair flat against your head, then put on a wig cap, hold the wig by its ear tabs, and place it over your head from front to back, adjusting until the lace sits just at your natural hairline. The most important tip for beginners is to secure the wig with bobby pins or an adjustable strap before styling, and never pull the wig over your head without a cap or protective base — that stretches the lace and shortens the wig’s life.
Step 1: Prep Your Hair
Your natural hair needs to lie flat under the wig so the cap doesn’t show and the wig fits smoothly.
- Detangle your hair with a wide-tooth comb. Tangles create bumps under the cap.
- If you have long hair, braid it in flat cornrows or twist it into a low bun. Use small, tight braids that lie flat against your scalp.
- If you have short hair, apply a light gel or edge control and brush it back and down.
- For extra hold, wrap a satin scarf around your head for a few minutes to flatten flyaways.
Don’t use heavy oils or leave-in conditioners — they can make the cap slip and leave residue on the wig’s lace.
Step 2: Put On a Wig Cap
A wig cap is a thin mesh or nylon cover that keeps your hair contained and gives the wig a non-slip base.
- Choose a cap that matches your skin tone — it will show through the lace and look more natural.
- Hold the cap with both hands at the opening, stretch it slightly, and pull it over your head from the forehead down.
- Adjust so the cap’s edge sits just behind your natural hairline. Tuck any stray hairs underneath.
- Secure with bobby pins at the sides and back if the cap feels loose.
Skip the cap only if you’re using a glueless wig with a silicone grip band — but for beginners, a cap is the safest bet. If you’re not sure which cap size you need, our wig cap size chart can help.
Step 3: Position the Wig
Now the wig goes on. The golden rule: front to back, never back to front.
- Hold the wig by the ear tabs (the small reinforced areas above the ears) with both hands.
- Tilt your head slightly forward and place the wig’s front edge at your forehead, about one to two finger-widths above your eyebrows.
- Slide the wig backward over your head, keeping the front edge in place. Do not pull it down from the back — that stretches the lace.
- Align the ear tabs with your ears. The wig should sit straight, not crooked.
- Check the hairline: the lace should sit at your natural hairline, not above it. If it’s too far forward or back, adjust by nudging the wig gently.
If your wig has a glueless cap (with combs or a silicone grip), you can wear it without adhesive. If it’s a full lace wig, you may choose to glue it down for extra security — but for everyday wear, many beginners skip the glue. See our glueless wigs for beginners guide for more.
Step 4: Secure the Wig
A wig that moves is a wig that looks fake. Secure it before you style.
- If the wig has an adjustable strap at the back, tighten it to fit your head snugly.
- Use bobby pins that match your hair color: slide them through the wig’s cap and into your natural hair at the sides, back, and front (under the lace).
- For extra hold, apply a small amount of wig adhesive or tape along the hairline — but only if you’re comfortable with it. Always patch-test on your skin first and stop if you feel irritation.
- If your wig has combs inside, press them gently into your natural hair at the temples and nape.
Don’t over-pin — two to four pins are usually enough. Too many pins can cause headaches and damage the wig’s cap.
Step 5: Style and Blend
Now make it look like it grew out of your head.
- Pluck the parting (if needed) to create a more natural hairline. Use tweezers to remove a few hairs along the part, but go slowly — you can’t put them back.
- Style the hair using a wide-tooth comb or your fingers. Use heat tools on low heat only if the wig is heat-friendly (check the label).
- Blend the wig with your own hair at the temples and nape. You can leave a few strands of your natural hair out to frame your face.
- Apply a light-hold hairspray to keep flyaways down, but avoid spraying directly on the lace.
For a more natural look, consider a full lace wig — the sheer lace allows for a realistic parting. If you’re interested in the differences, our article on full lace wigs for a natural look covers it.
Common Mistakes
- Skipping the wig cap — without a cap, your hair can slip and create lumps. Always use a cap, unless your wig has a grip band.
- Pulling the wig on from the back — this stretches the lace and can tear it. Always place the front first and slide back.
- Placing the hairline too high — if the lace sits above your natural hairline, it looks obvious. Keep it at your natural line.
- Using too many bobby pins — this can cause headaches and damage the wig’s cap. Use only what’s needed.
- Glueing without a patch test — adhesive can irritate skin. Always test a small area first.
- Trimming the lace before trying the wig on — you might cut too much. Put the wig on first, then trim carefully.
Aftercare: Keeping Your Wig Fresh
After wearing, take care of both the wig and your own hair.
- At night, remove the wig and store it on a mannequin head or in a silk bag. Never sleep in a wig unless it’s a sleep cap.
- Wash your wig every 6-8 wears (or every 2 weeks if you wear it daily). Use a sulfate-free shampoo and cool water. See our synthetic wig washing guide for details — the same principles apply to human hair wigs.
- Moisturize your natural hair underneath with a light oil or leave-in conditioner, especially if you wear wigs often.
- Let the wig air dry on a stand. Don’t wring it or use a hairdryer on high heat.
FAQ
How long does it take to put on a wig?
Once you’ve practiced a few times, putting on a wig takes about 5–10 minutes. The first time may take longer as you adjust the fit and style.
Can I sleep in a wig?
It’s not recommended. Sleeping in a wig can cause tangling, matting, and friction damage. Remove it and store it properly.
How do I know if my wig is too big or too small?
If the wig slips forward or leaves gaps at the temples, it’s too big. If it feels tight or leaves red marks, it’s too small. Most wigs have adjustable straps.
Should I glue my wig down every time?
No. For daily wear, you can use bobby pins and a snug fit. Glue is best for special occasions or active days. Always patch-test adhesive first.
When You Might Need a Replacement
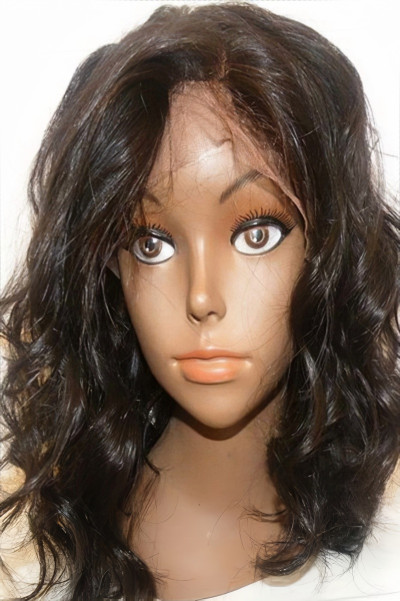
If your wig is beyond repair — torn lace, major shedding, or a broken cap — you may need a new one. For a natural look, a full lace wig in Indian Remy human hair is a solid choice: it offers a realistic hairline and can be styled with heat. You can browse the Human Hair Wigs collection at LaceWigsBuy to see options like the 14” Body Wave Full Lace Wig, #1B Natural Black or the 20” Body Wave Full Lace Wig, #1B Natural Black. If you prefer a glueless option, check the Glueless Lace Wigs collection — many are ready to wear right out of the box.

About WigAnswers
WigAnswers is an independent, English-language wig guide site. We’re not owned by any wig brand or retailer, so our advice stays unbiased. Every guide opens with a direct answer, and our product recommendations are editorial picks that link to third-party retailers. For more wig tips and honest guidance, visit WigAnswers.